For a video overview, click here!
Step 1: Manage Sellers
There are 3 ways to add your sellers:
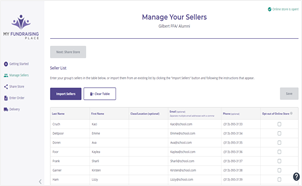
- Manually add sellers (recommended) – Simply type the names and email addresses of your sellers into the table. Feel free to use parent/guardian email addresses. Once all sellers have been entered, click Save.
- Import sellers – Copy seller information from a class roster onto the downloadable template and then import. Be sure to add email addresses so sellers can receive a link to share the online store with their friends and family.
- Invite sellers to self-register – Simply send participants the link to register for their fundraiser. Sellers will be asked to verify their email address and will automatically receive a link to start selling. This method has the lowest participation rate. Visit with your fundraising representative to see if this option is a good fit for your situation.
Step 2: Share Store Options
General Store Link – Share your groups fundraising store to the public through social media & sharing Apps such as Facebook, WhatsApp, Messenger & Twitter.
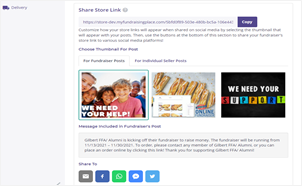
To share your general store link:
- Choose one of three images provided. There should be a green box around the chosen image. This image will be displayed with the provided message to supporters.
- Click on the social media and/or sharing app icons to share your general store link.
- Email icon – this option inserts the general store link into an email that you can include your own personal message to your mail recipients.
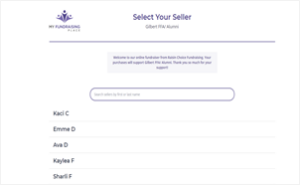
When a supporter clicks on any form of your general store share links, they will be brought to the “Select Your Seller” page where they will be able to choose the seller they wish to purchase from.
Individual Seller Link– Follow these steps so that a seller can share their own unique link to bring their friends and family directly to their personal store!

- Choose one of the 3 images that will accompany the provided message on your seller’s social media post.

2. The share icons are found on the store page – this allows for viral sharing amongst friends!
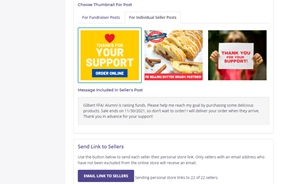
- Email Link to Sellers – pressing the purple button will send the individual store link to each seller that has an associated email address. This will allow the sellers to forward on the link to take their supporters directly to the seller’s personal store.
Step 3: Track your progress – Enter Order
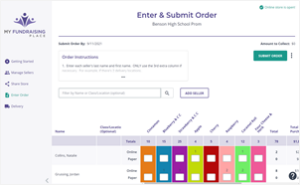
Track your progress on the Enter Order page. Online orders will automatically show up so you can track your progress in real time.
If you’re also using traditional paper order forms, enter those orders on this page at the end of your fundraiser.
Once all paper orders have been entered, and your sale is complete, click Submit Order. This will close your online store and no additional online orders will be accepted. Once your online store is closed, it cannot be re-opened because all orders will be submitted to your fundraising company for fulfillment. You can continue to add your Paper orders until your fundraising company stages the order for fulfillment. If you have any questions regarding late orders, reach out to your fundraising representative.
Step 4: Email sellers their seller report
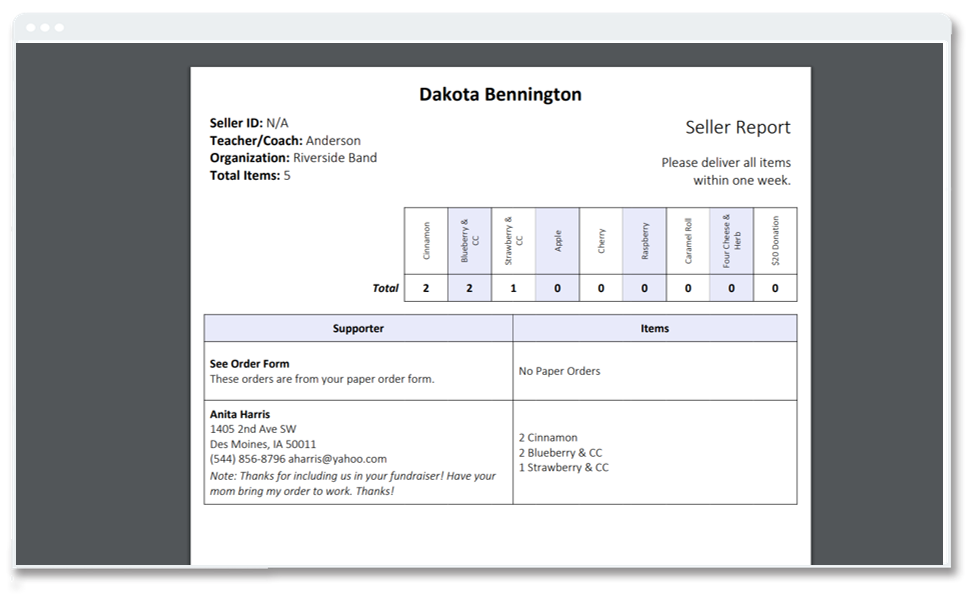
Once your sale is complete and your order has been submitted, click Email Seller Report to Sellers from the Enter Order page.
This will send sellers a document that shows the delivery address and contact information for their supporters so they can arrange a time to deliver the orders.
Step 5: Delivery
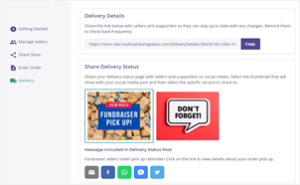 Remind sellers of the delivery date and time so they remember to pick up their orders.
Share a reminder on your Groups social media and sharing apps by choosing one of the images provided and then clicking on the social media and sharing buttons. You can also send this link to supporters, to keep them abreast when sellers are scheduled to pick up their fundraising products.