• Help
  • Community
  • Templates
  • Webinars
  • Help
  • Community
  • Templates
  • Webinars

Operations

home/Knowledge Base/Operations
Try:Getting Started, Create a Contact, QuickBooks

Printing Labels

88 views August 17, 2018 May 8, 2019 Jordan Knapp 2

Printing Labels

  1. Go to Sales > Fundraisers > Seller Info Tab

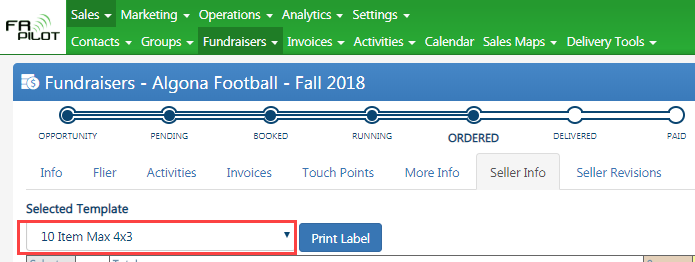
  2. Select a Label Template from the drop-down
  3. Click on Print Label button
    • Once you click the Print Label button, My Fundraising Place assumes that you have printed the labels
    • This will create a zip folder including these files:
      1. Batch 1 (Word document used to print out the prepack labels separated by batch size)
      2. Group Name Report (Use as a label for the cart for the freezer)
      3. Group Summary Report (Shows Items, cost, profit, averages)
      4. Seller Info Pick Ticket 1 (Shows how many items. Cases plus eaches. Used to pick from the freezer)
      5. SellerStat (Seller Info Tab information in a spreadsheet to use however you want)


Was this helpful?

2 Yes 1 No
Related Articles
  • Record Deposit Statement in QuickBooks
  • Mixed Pallet Ordering Guide
  • Delivery Scheduling Tool
  • Sales Planning Tool
  • Order Changes
  • Group Leader Portal and Pre-packs

Operations
  • Record Deposit Statement in QuickBooks
  • Mixed Pallet Ordering Guide
  • Delivery Scheduling Tool
  • Sales Planning Tool
  • Order Changes
View All 22
Popular Articles
  • Printing Labels
  • Marketing Lists Walk-through
  • Setting up Touch Points
  • Creating a fundraiser
  • Sales Cadence Process
Categories
  • Finance
  • Getting Started
  • Marketing
  • Operations
  • Sales
  • Settings
  • © My Fundraising Place | All Rights Reserved
    213 4th Avenue Northeast West Bend, IA 50597