Create a new Product
- Add/Activate Product (if needed)
- See Product Maintenance Information Sheet on the My Fundraising Place Support Website:
- https://support.myfundraisingplace.com/knowledgebase/products-maintenance/
- Adding a Non-Country Maid Product Line
- Adding a Non-Country Maid Product
- Activating/Deactivating a Product Line
- Activating/Deactivating a Product
- https://support.myfundraisingplace.com/knowledgebase/products-maintenance/
- See Product Maintenance Information Sheet on the My Fundraising Place Support Website:
- Create the product in Quickbooks (if not already created)
- Map the My Fundraising Place item to the Quickbooks item in the Sync Agent
- Modify Price List/Create New Price List
- Modify Fliers/Prepack Labels (if needed)
- Create a New Program
Create the product in Quickbooks (if not already created):
- Log into Quickbooks
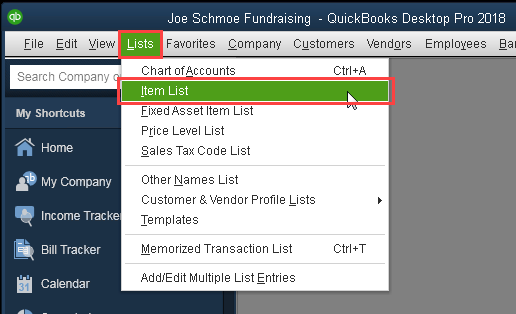
- Click on Lists
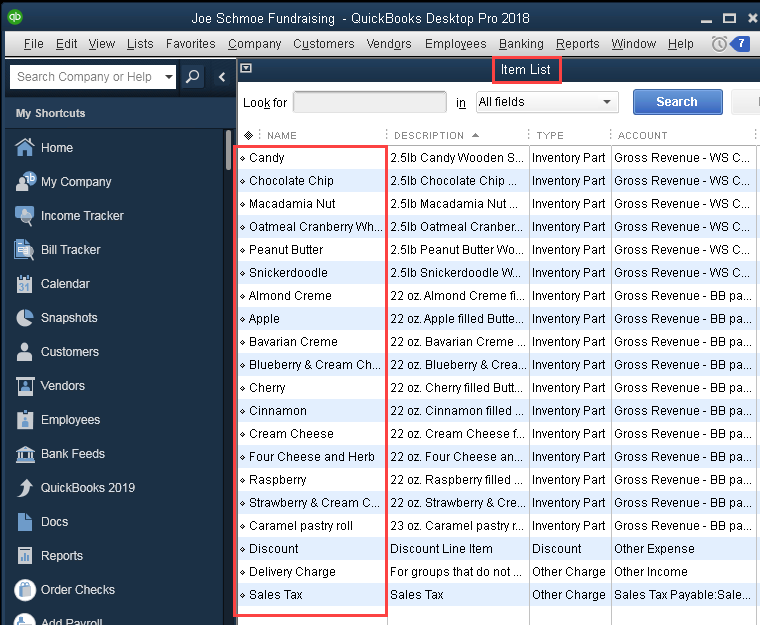
- Click on Items List
- Check to see if you have the new flavor in the Items List
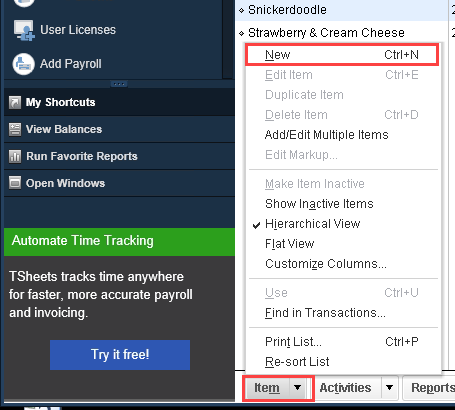
- If the product does not exist, click on the Item button at the bottom of the window
-
- Select New from the popup menu
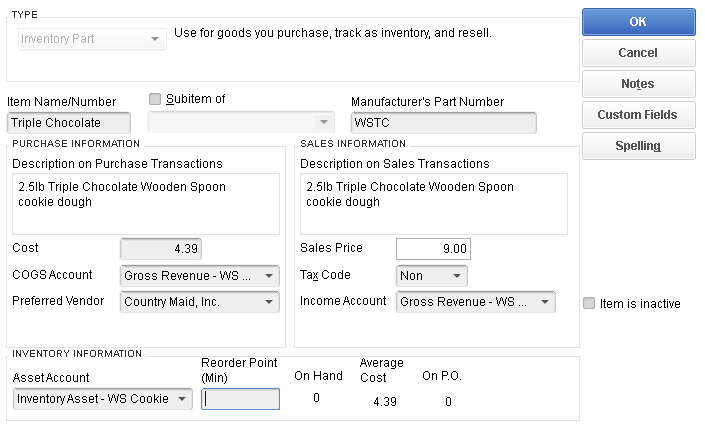
- Enter the necessary information for the new flavor (Triple Chocolate used here as an example):
- Type: Inventory Part
- Item Name/Number: Triple Chocolate
- Manufacturer’s Part Number: WSTC
- Cost: 4.39
- COGS Account: COGS – WS Cookie
- Preferred Vendor: Country Maid, Inc.
- Income Account: Gross Revenue – WS Cookie
- Asset Account: Inventory Asset – WS Cookie
- Select New from the popup menu
-
- Click on OK
Map the My Fundraising Place item to the Quickbooks item in the Sync Agent:
- Open the My Fundraising Place Sync Agent
- Sign in
- Go to the Settings Tab
- Click on the Load and Edit Settings button
- This will load all current Quickbooks information into the My Fundraising Place Agent

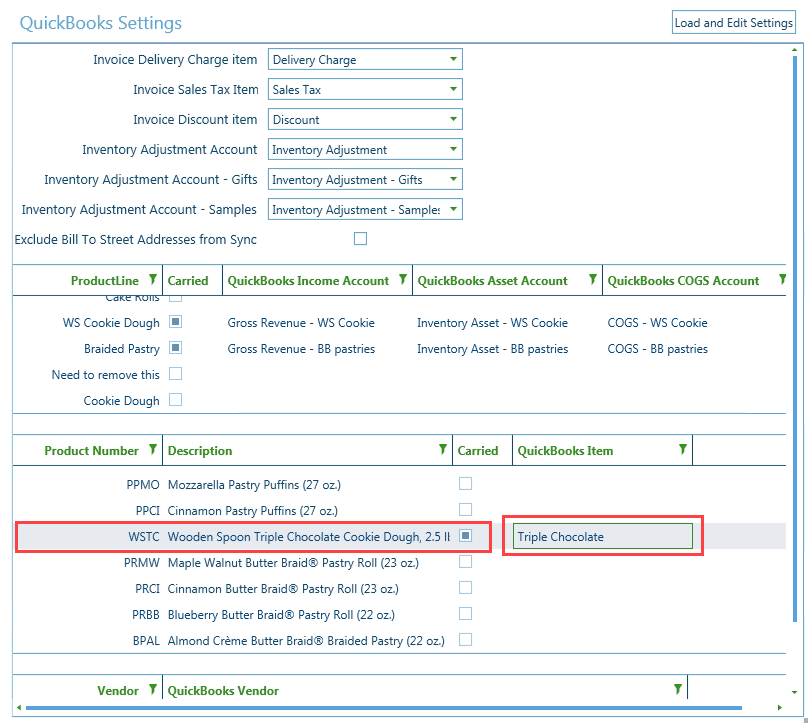
- Once the loading has finished, find the product from My Fundraising Place on the left side of Product List
- Click on the Product Line (WSTC)
- It should be marked as “carried” but not have a QB name on the right side of the list
- Click on the blank area to the right and a dropdown box will appear
- Select the Quickbooks Item from the dropdown box (Triple Chocolate)
- Click on the Product Line (WSTC)
- Click on the Save button (top right corner)
Modify Price List or Create New Price List (if not already created):
- When a new flavor is added it is automatically added to existing pricelists but with $0.00 as its price
- If the existing pricelists haven’t been used in My Fundraising Place:
- You can change the price on the new product in the existing pricelist
- If the existing pricelists have been used in My Fundraising Place:
- Copy an existing Price List to create a new Price List where you can add a price to the new product
Modify Fliers/Prepack Labels (if needed):
- If you will have the same number of flavors (just switching flavors):
- If you currently have a Flier/Prepack Label that has been created with all variables and no hardcoded fields
- You should be OK. Please do a test on your flier/label to make sure the new flavor is showing
- If you currently have a Flier/Prepack Label that has been created with all variables and no hardcoded fields
- If you are adding a flavor:
- You will need to create a new Flier/Prepack Label. Please create with all variables and no hardcoded fields in it.
- We are currently in the process of creating standard prepack labels and fliers. Please feel free to contact dealer.support@countrymaid.net for help if needed with these.
Create a New Program
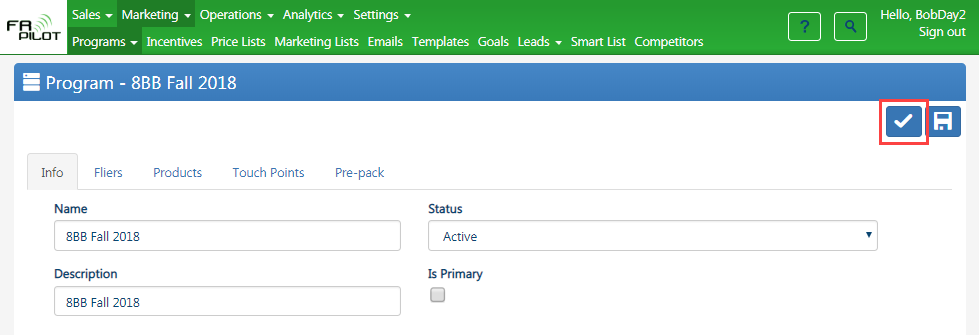
- Go to Marketing > Programs
- Click on the New Program button

- Info Tab
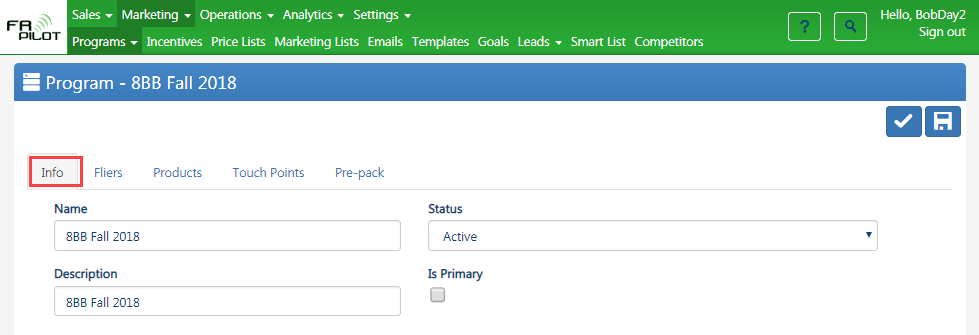
- Name/Description: Include the name of the season in the name of the program if possible
- Check Primary if applicable
- Fliers Tab
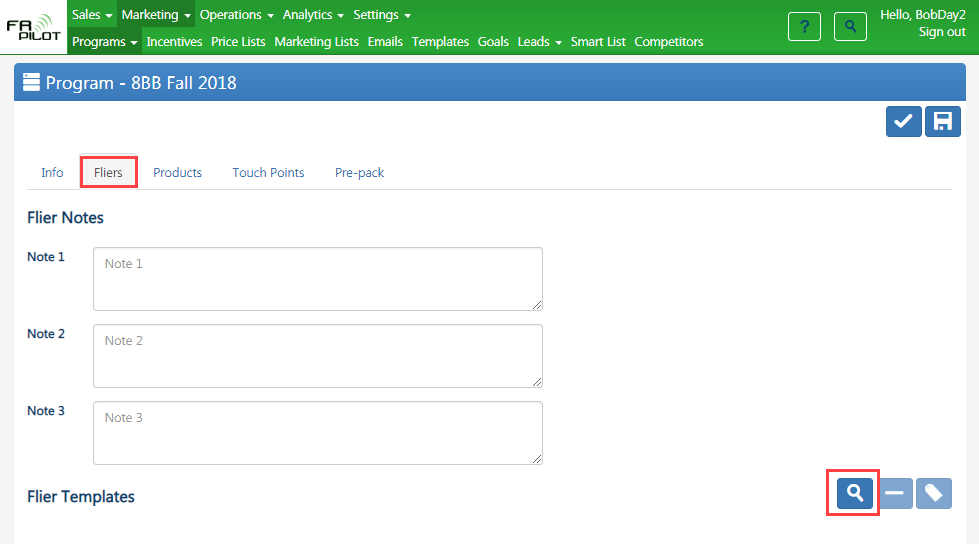
- Click on the Add Flier to Program button
- Select Flier Template
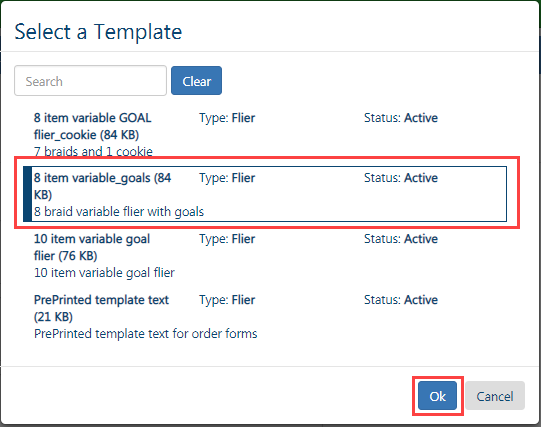
- Click OK
- Products Tab

- Click on the Add Program Detail button
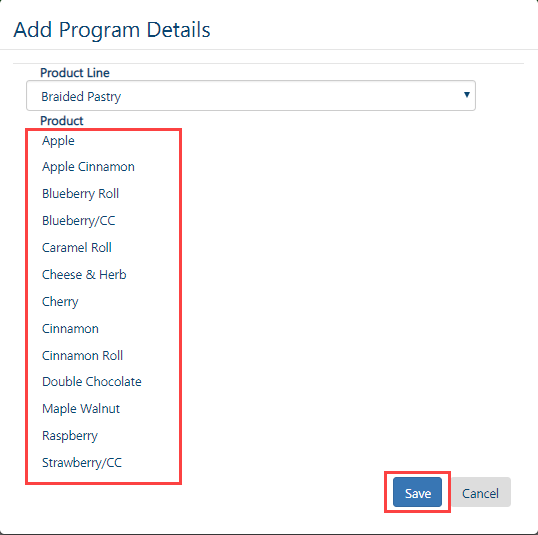
- Select products
- Click Save
- Click on the Add Program Detail button
- Touchpoints Tab
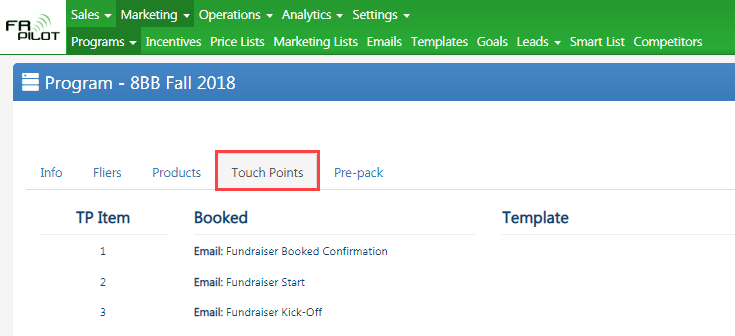
- Review Touchpoints and make changes if needed
- Pre-pack Tab
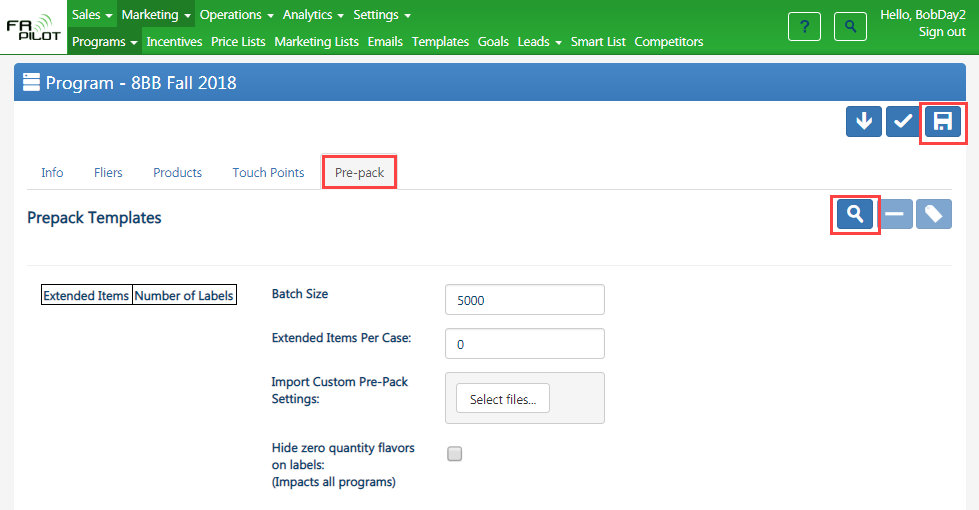
- Click on Add Prepack to Program button
- Select Prepack Template
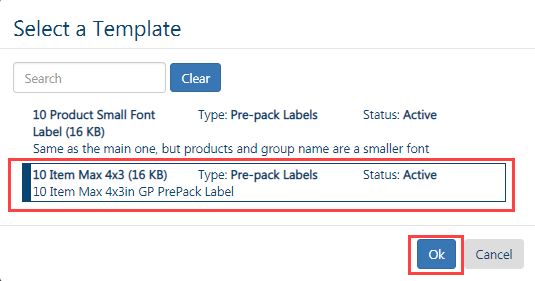
- Click OK
- Info Tab
- Click on the Save & Close button
